What Have You Done To Your Van Today?

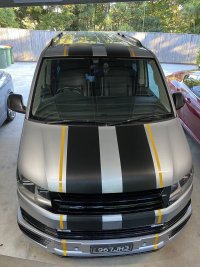
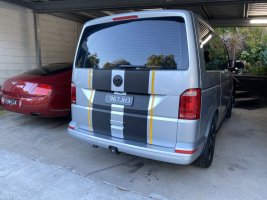
The "6D carbon fibre gloss" film I got off Amazon started to craze and bubble after a few weeks in the sun. I guess you get what pay for. I got some proper 3M 8020 wrap, and it was amazing how much easier it was to work with, the bubbles were so easy to remove, it stuck down easily, even the contour sections were so easy to do. It is a matt film, with a texture to it. We were impressed enough to do the section of the roof and the rear door. I'll do the top part of the door next weekend, maybe I will have finished the rear spoiler by then as well. We will get a stick on solar panel for the roof, to charge up some leisure batteries, so we can run our little fridge and maybe a small inverter to give us 240V as well. I'll think about that when we start the interior.
2024-05-19 16.05.06.jpg2024-05-19 16.04.35.jpg
 
The "6D carbon fibre gloss" film I got off Amazon started to craze and bubble after a few weeks in the sun. I guess you get what pay for. I got some proper 3M 8020 wrap, and it was amazing how much easier it was to work with, the bubbles were so easy to remove, it stuck down easily, even the contour sections were so easy to do. It is a matt film, with a texture to it. We were impressed enough to do the section of the roof and the rear door. I'll do the top part of the door next weekend, maybe I will have finished the rear spoiler by then as well. We will get a stick on solar panel for the roof, to charge up some leisure batteries, so we can run our little fridge and maybe a small inverter to give us 240V as well. I'll think about that when we start the interior.

View attachment 241922View attachment 241923
Love it , nicely different.
 
Did you do them on the van? If so how was it?
I wanted to do mine last summer but never got round to it.
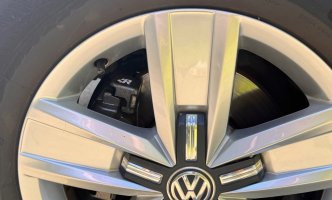
It was mostly straightforward. Followed a combination of @Dellmassive ’s guide plus a FoliaTec vid and an American guy on YouTube. Took about 4 hours, 2 of which were drying time. Decided against clear lacquering after reading some horror stories when the lacquer goes on and good stories from people who put the decals on without clear lacquer. So hard to know when the paint is dry enough to apply decals though. In hindsight would have left it another hour - had to do a little touch up but it touched up nicely.

Will need to tackle rears another day.

IMG_6897.jpeg
 
It was mostly straightforward. Followed a combination of @Dellmassive ’s guide plus a FoliaTec vid and an American guy on YouTube. Took about 4 hours, 2 of which were drying time. Decided against clear lacquering after reading some horror stories when the lacquer goes on and good stories from people who put the decals on without clear lacquer. So hard to know when the paint is dry enough to apply decals though. In hindsight would have left it another hour - had to do a little touch up but it touched up nicely.

Will need to tackle rears another day.

View attachment 242025
That's that's good to know, I have the high temp lacquer but might not bother. Just thought it would help hold the decals too. What was the issues with it?
 
That's that's good to know, I have the high temp lacquer but might not bother. Just thought it would help hold the decals too. What was the issues with it?
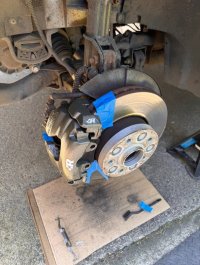
Every Amazon review of HT / XHT lacquer I read bar about two said it crazed, lifted or melted the decals when used on calipers. I’m sure if you have compatible paint and lacquer systems it would be fine but I didn’t want to take the risk.
 
Every Amazon review of HT / XHT lacquer I read bar about two said it crazed, lifted or melted the decals when used on calipers. I’m sure if you have compatible paint and lacquer systems it would be fine but I didn’t want to take the risk.
Oh no! That would be a nightmare after waiting all that time to dry. Think I will avoid that then...
 
That’s pretty scary on a C rated tyre, what was the DOT code (age of the tyre) and were you running at VW recommended pressures?
Code suggested 2019 tyre. Yep, running at recommended pressures. I think I caught a the rusty remains of a sign post hidden in a grass verge a few days before.
 
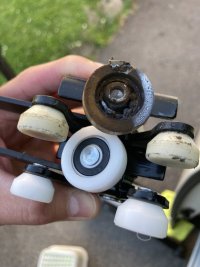
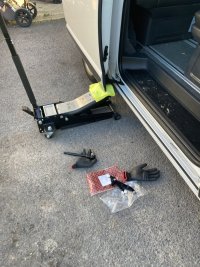
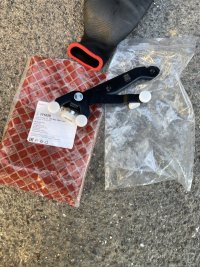
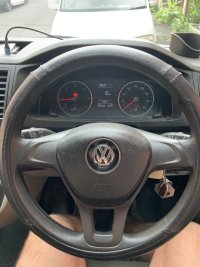
Had an issue with my drivers electric sliding door kicking back just as it closes, after a bit of research on here and YouTube, it turns out the lower roller had collapsed.

A quick easy fix and only £15 for a decent Febi one off EBay…

IMG_5093.jpeg

IMG_5092.jpeg

IMG_5091.jpeg
 
Last edited:
My Shuttle's paint work has been getting slightly worse over the time I have owned it, with stone chips, a pinch point between the bumper and the body resulting in paint flecking off, bikes being lent against it and finally my son dinging the door of the car off the driver's side sliding door recently....

So I took my pride n joy to the local body shop respray place and gave it some TLC. I'm very happy with the result. The chips have gone, the dent and paint gash is gone from the side door. They even removed two dents in front of the rear near side in front of the rear wheel arch which were there when I bought it three years ago. And they were able to remove slight deformation and discoloration of the bumper from when Mrs Dave reversed into a lamp post a month after I bought it!

It wasn't cheap, but it now looks mint!

Now I need to put it in a plexiglass display case before someone dings it Again!!

IMG20240521164850.jpg

IMG20240521164902.jpg
 
Back
Top